• How to setup a dockerized Redis server on a Raspberry Pi Raspberry Pi Docker

    For an upcoming project I want to use microservices on my Raspberry Pi. This means multiple process will take care of individual tasks. To coordinate these processes they need to communicate with each other. A great way to implement this is using a Redis server. Redis is an open source (BSD licensed), in-memory data structure store and can be used as a database, cache and message broker. Since version 4.0 Redis supports ARM processors and gets tested against the Raspberry Pi.

    All microservices on the Raspberry will run as docker containers. Docker provides a method of packaging software to include not only your code, but also other components such as a full file system, system tools, services, and libraries. You can then run the software on multiple machines without a lot of setup. Each microservice is independent and it is very easy to manage or exchange certain services.

    The short tutorial assumes you already have a Raspberry Pi setup with Raspbian.

    Read more
  • How to use a Raspberry Pi to monitor your Wireless Traffic Raspberry Pi Security

    Lately I visited my first Chaos Computer Congress (34C3) which was a really great event. I learned a lot about security and data privacy there. The result was that after the first day I found myself banning Amazon Echo from my living room. During the following days my suspicion towards smart home devices grew more and more. So I decided that it was time to find out which of my devices enjoy talking home and are sending data about me to the cloud. As all my smart home devices are connected via wifi I decided to monitor the wireless traffic of suspicious devices. A Raspberry Pi 3 which I had in spare should provide a wireless access point and bridge it to the ethernet port that goes straight to the router. This way the device under surveillance can talk home unaffected. But I can now monitor the traffic with a network monitoring tool like Wireshark.

    Read more
  • WiPy2 Micropython: Temperature measuring via 1-Wire Micropython

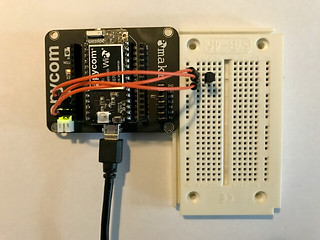
    One of the first IoT use cases that comes in ones mind ist measuring the temperature of your environment. An easy and cost-efficient way is to use an 1-Wire bus sensor like the DS18S20. You can get this sensor for around 2,15€ and it is really easy to implement in your µC as there are a bunch of libraries for the 1-Wire protocol. So the first thing to do is put the sensor in a bread board and connect it to your WiPy2 breakout board. The pin assignment is simple. Connect Pin1 of the sensor to GND, Pin2 to G10 and Pin3 to 3.3V. That' s it.

    WiPy2_with_DS1820

    Read more
  • WiPy2 Micropython: Getting started Micropython

    Lately I proudly got hold of a WiPy2.0 board and this post is about how I got started with it, established a connection to my Wifi and made the WiPy to connect automatically on boot.

    Read more
  • Remote GUI for Beaglebone Black with PyQt5 and X11 Forwarding Python Flask PyQt

    Lately I found a Beaglebone Black in my stock and had the idea to use it for some kind of fermentation control with a graphical user interface (GUI). For testing purposes I first wanted to run a small GUI on the Beaglebone via remote control (SSH). SSH has this great -X switch that enables X11 Forwarding. So I wanted to use this from my Mac to remote control the Qt GUI on my Beaglebone. Here is how I did it.

    Read more