


Introduction
I am a really great fan of Markdown. This is mainly because it is one of the few Markup languages that produces clear, neat source files during the writing process as well as structured, good-looking websites after rendering. So it is not surprising that I have been using Markdown for project documentation for quite a while now. Normally project documentations tend to consist of more then one document. So there is this static website generator called mkdocs that generates a complete website out of multiple Markdown documents arranged in a directory structure. It can be enhanced by a number of plugins that make it much easier to create a layout of your liking. Gradually I developed a certain project structure with always the same Plugins installed and it showed that I had to do the same steps over and over again for each new project. I figured it would be great to use some kind of template system. Luckily I heard about Cookiecutter which is a command-line utility that creates projects from so-called "cookie cutters" which are basically project templates. Here I will show how to create a mkdocs template with Cookiecutter that you can use everytime you create a new project documentation. We will also use the still new pipenv virtual environment and package manager to automatically install the needed Markdown plugins.
Install mkdocs and Cookiecutter
Mkdocs and Cookiecutter are both Python packages. Make sure you have Python 3 installed. I think both projects work with Python 2 as well but Python 3 clearly is the future, so why stick to the old stuff?! If you are still unsure about whether to use Pyhthon 3 have a look at http://whypy3.com.
We use our Python package manager pip to install pipenv, mkdocs and cookiecutter.
$ pip install pipenv mkdocs cookiecutter
Create a Cookiecutter (template)
Creating a new template with Cookiecutter is pretty straight-forward. First we create a new directory that we call cookiecutter-mkdocs.
$ mkdir cookiecutter-mkdocs
$ cd cookiecutter-mkdocs
Inside this directory we will create a directory template.
$ mkdir {{ cookiecutter.project_name }}
Cookiecutter uses the Jinja2 templating system. This allows you to customize directory names, file names or text within files for each new project. Cookiecutter will ask you for the values of the templates each time you create a new project. So in this case Cookiecutter will ask us for the project_name and will name the directory accordingly to the user input or use default values. Next we create a file called cookiecutter.json which will contain all the default values for our template variables.
cookiecutter.json:
{
    "project_name": "project_foobar"
    "site_name": "Foobar Documentation"
}
So besides our project name we also use a site_name which will be the headline of our documentation.
Add mkdocs.yml file
Now, mkdocs needs a mkdocs.yml file that holds our configuration. We will place this file in our directory template {{ cookiecutter.project_name }}.
{{ cookiecutter.project_name }}/mkdocs.yml:
site_name: {{ cookiecutter.site_name }}

theme: rtd-dropdown
use_directory_urls: false
strict: true
markdown_extensions:
  - extra
  - lightbox
  - math:
      enable_dollar_delimiter: True
extra_css:
  - css/custom.css
  - css/lightbox.min.css
extra_javascript:
  - js/lightbox.min.js
  - https://cdnjs.cloudflare.com/ajax/libs/mathjax/2.7.2/MathJax.js?config=TeX-AMS_HTML
Now this file contains all the configuration to make mkdocs fit our needs. We will use the rtd-markdown theme which is basically the theme Readthedocs uses but with collapsing menu support. Then we set use_directory_urls to False which enables you to open the compiled HTML files directly from the file-system without having to use ther mkdocs serve command. We will also use some markdown extensions:
- Extra is actually a compilation of various Python-Markdown extensions. I mostly use it because it includes AttributeLists which allows you to set HTML attributes of elements within your Markdown file.
- Lightbox is a great extension that allows you to open inline-images within a lightbox.
- math renders Latex equations within your document. Use the
enable_dollar_delimiteroption to allow dollar delimiters.
Add extra CSS and Javascript files
To make lightbox work properly we need to include lightbox.min.js and lightbox.min.css in the documentation build. We do this with the extra_css and extra_js statements in the mkdocs.yml file. Of course we also need to add the files to our directory. Download Lightbox2 from here and copy lightbox.min.js to {{ cookiecutter.project_name }}/docs/js/lightbox.min.js and lightbox.min.css to {{ cookiecutter.project_name }}/docs/css/lightbox.min.css.
We also want to have some custom CSS classes that we will put in docs/css/custom.css:
.thumbnail {
  max-width: 200px !important;
  max-height: 200px;
}
We can use this Thumbnail class to limit the size of images we include in our documentation. As we have the Lightbox to watch images in large we don't always need to include them in full-size in the documentation.
We can also include files from CDNs. The last line of our mkdocs.yml imports the mathjax Javascript library. Be aware that if you include a file from a CDN source your will need internet access for it to work.
Last but not least we need a Markdown file that holds the content of our first page:
docs/index.md:
# Header
## Subheader
* Bullet 1
* Bullet 2
* Bullet 3
**An image. Click to open the lightbox.**
{.thumbnail}
And thanks to Mathjax we also can use equations:
$ R = \frac{U}{I} $
Our whole directory structure should now look like this:
- cookiecutter-mkdocs
    - cookiecutter.json
    - {{ cookiecutter.directory }}
        - mkdocs.yml
        - docs
            - index.md
            - css
                - custom.css
                - lightbox.min.css
            - js
                - lightbox.min.js
Add a Pipfile
Maybe you' re already using Pythons recommended packaging system Pipenv. If not you should give it a try. It automatically creates and manages a virtualenv for your projects, as well as adds/removes packages from your Pipfile as you install/uninstall packages. To create a virtual environment a Pipfile is needed. This file contains all packages that should be installed on the virtual environment. So we create a new Pipfile and add our Python packages.
cookiecutter-mkdocs/Pipfile
[[source]]

url = "https://pypi.python.org/simple"
verify_ssl = true
name = "pypi"


[packages]

mkdocs = "*"
python-markdown-math = "*"
markdown-lightbox = {git = "git@github.com:MrLeeh/markdown-lightbox.git", editable = true}
mkdocs-rtd-dropdown = {git = "https://github.com/cjsheets/mkdocs-rtd-dropdown.git", editable = true}


[dev-packages]
Use Cookiecutter to create a new project
After all the preparations we have done to create our cookiecutter it is now very easy to create a fresh project with all files and directories already in the right place.
$ cookiecutter cookiecutter-mkdocs

directory_name [project]: project_foo
site_name [documentation]: foo_documentation
Cookiecutter will ask you for the values for the two parameters. Change them to your liking or just hit ENTER to use the defaults. Cookiecutter will create a directory project_foo and add all the files we defined in our template.
Make sure you have Pipenv installed on your system. Now we install all necessary Python packages in a new virtual environment:
$ pipenv install
Creating a virtualenv for this project…
Using base prefix '/Users/stefan/.pyenv/versions/3.6.2'
New python executable in /Users/stefan/.venvs/foo_project-kxDgXKad/bin/python3.6
Also creating executable in /Users/stefan/.venvs/foo_project-kxDgXKad/bin/python
Installing setuptools, pip, wheel...done.

Virtualenv location: /Users/stefan/.venvs/foo_project-kxDgXKad
Pipfile.lock not found, creating…
Locking [dev-packages] dependencies…
Locking [packages] dependencies…
Updated Pipfile.lock (12c3db)!
Installing dependencies from Pipfile.lock (12c3db)…
To activate this project's virtualenv, run the following:
 $ pipenv shell
To serve the documentation as HTML just use the following command:
$ pipenv run mkdocs serve
Now you can proudly watch your first document with your Webbrowser on http://localhost:8000. It should look somehow like this:
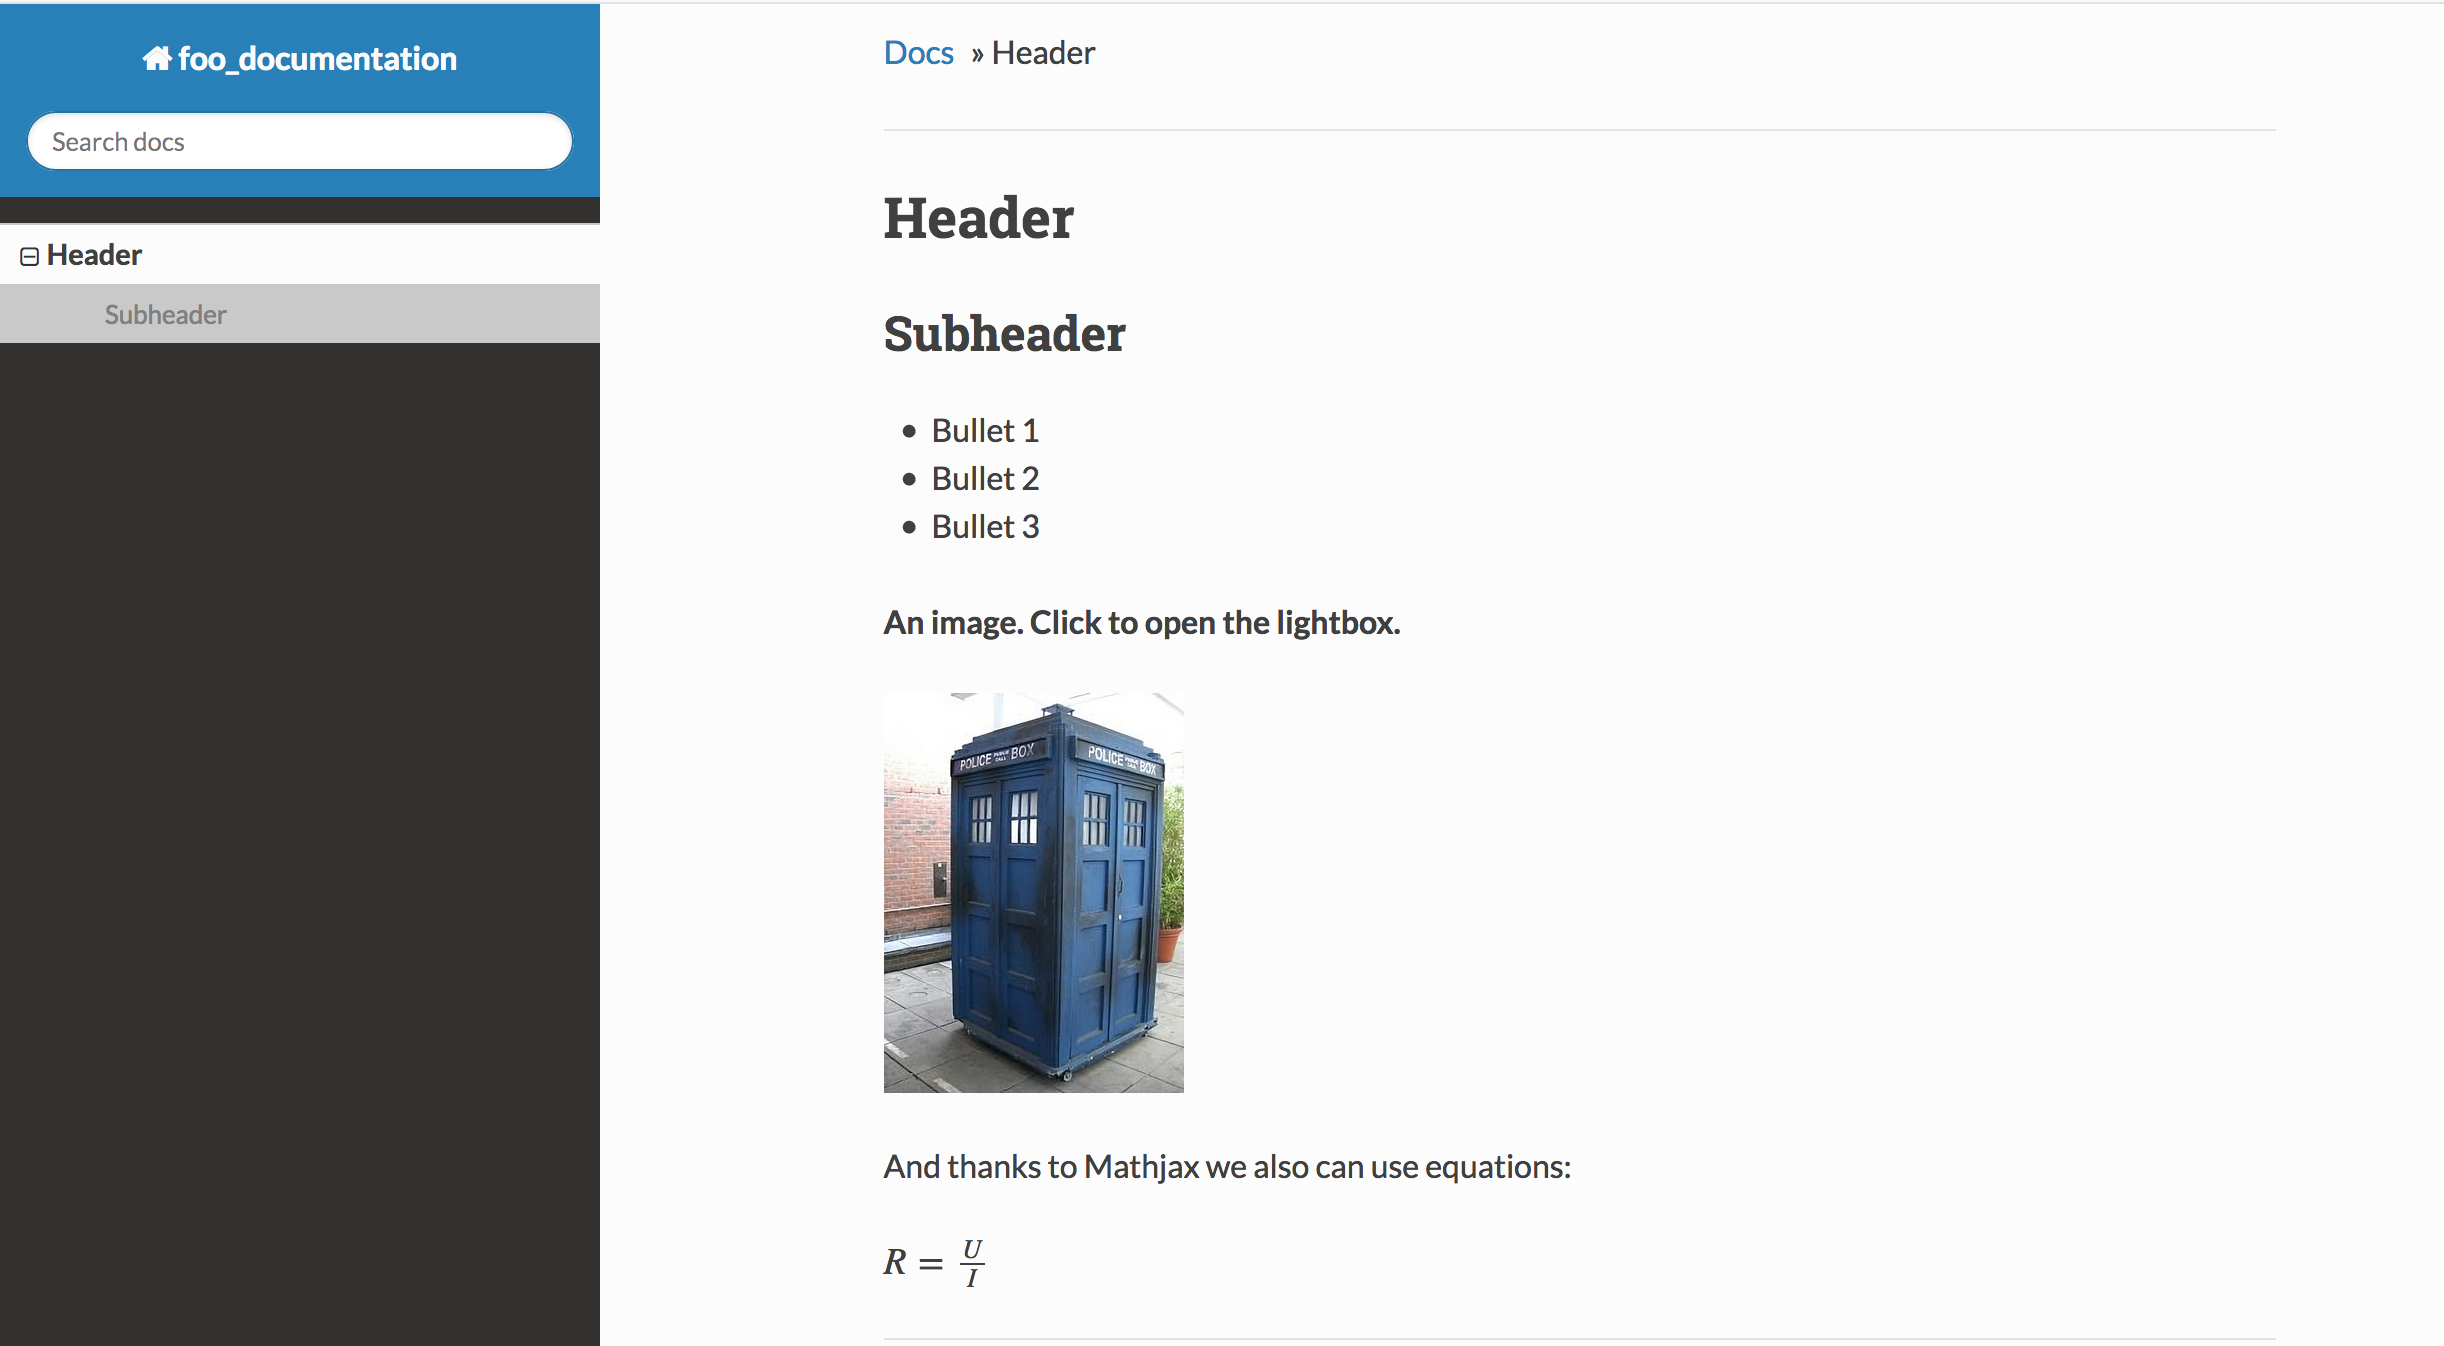
This is it. Now you can use this cookie-cutter everytime you want to create a new project-documentation. For an even better workflow you can upload your cookie-cutter to Github. Cookiecutter supports Github out of the box. Try it out:
$ cookiecutter https://github.com/stlehmann/cookiecutter-mkdocs.git